- All
- Product Name
- Product Keyword
- Product Model
- Product Summary
- Product Description
- Multi Field Search
Views: 0 Author: Site Editor Publish Time: 2025-09-23 Origin: Site


Thinking about giving your space a fresh look? You can install a wall panel even if you’re new to home projects. Wall panels don’t just make rooms look stylish; they protect your walls, offer flexible design choices, and help with soundproofing. Here’s a quick look at why so many people love them:
Benefit | Description |
|---|---|
Aesthetic Appeal | Wall paneling brings a rich, modern style. |
Protection for Walls | Shields walls from dings and dents. |
Low Maintenance | Easy to clean and keep looking great. |
Flexible Design | Fits different tastes and budgets. |
Unipower has built a reputation for high-quality wall panel solutions. You’re about to discover how easy it can be to transform your home.
Wall panels make your room look nice. They also keep your walls safe from harm.
Pick easy materials like PVC or MDF. These are simple to put up and take care of.
Get your walls ready by cleaning them. Measure and mark the walls so you can install panels easily.
Do each step one at a time. First, plan where the panels will go. Next, cut the panels to fit. Then, attach the panels so they stay in place.
When you finish, fix any small mistakes. Clean up to make your project look neat and new.

Before you start your wall panel installation, you need to gather the right materials and tools. This step makes the whole process smoother and helps you avoid surprises along the way. Let’s break down what you’ll need and how to choose the best options for your project.
When you look at wall paneling, you’ll find several popular materials for home use:
PVC panels work great in bathrooms and kitchens. They resist water and last a long time.
Acrylic panels also suit wet areas, but they are heavier and a bit harder to install.
Glass panels look modern, but you usually need a pro to put them up.
Wood wall paneling brings warmth to living rooms and dining spaces. It needs more care and is not the best for damp spots.
MDF panels are budget-friendly and easy to paint, but they can swell if they get wet.
Acoustic fabric panels help with sound, perfect for busy or noisy rooms.
Tip: If you’re new to paneling, PVC and MDF panels are easier to handle and install. They often come with interlocking systems, making them a smart choice for beginners.
Unipower offers a wide range of wall panel products, including PVC slatwall panels, decorative trims, and storage accessories. You can check out our full selection at Unipower Wall Panels. These panels work well for home improvement, storage, and even garage upgrades.
When picking your material, think about durability, moisture resistance, looks, cost, and how easy it is to install. For example, PVC panels are waterproof and simple to clean, while wood panels add style but need more upkeep. Always match your paneling to the best surfaces for wood wall panels, like smooth, dry, and even walls.
You don’t need fancy tools to get started. Here’s a list of what you should have on hand:
Measuring tape
Level
Saw or cutter
Drill and screws
Adhesive or construction glue
Safety gear (goggles, gloves, dust mask)
Caulking gun
T-square or carpenter’s square
These tools help you measure, cut, and secure your panels with confidence. A level keeps your wall panel straight, and a good saw makes cutting easy.
Safety comes first during installation. Always wear safety goggles, gloves, and a dust mask when you cut or sand panels. Make sure your workspace stays clean and organized to prevent accidents. If you use adhesives or paints, open a window or use a fan for fresh air.
Note: Taking a few minutes to set up your safety gear can save you from injuries and make your project more enjoyable.
Ready to get started? With the right materials and tools, you’ll find wall panel installation much easier than you think. If you have questions, Unipower’s support team is here to help you every step of the way.
Getting your space ready is the secret to a smooth wall panel installation. You want to make sure everything is clean, straight, and free from obstacles before you start. Let’s walk through the steps together.
First, check the condition of your walls. Grab a level and run it horizontally, vertically, and diagonally. If you spot any areas that stick out or dip in more than 1/8 inch, mark them. Look for loose wallpaper, peeling paint, or anything unstable. Remove these so your panels have a solid surface to stick to. If your walls feel uneven, you might need to add furring strips to create a flat base. Don’t forget to take off outlet covers, switch plates, nails, and any decorations. Fill any big holes or cracks with filler and let it dry. If you see mold or mildew, treat it with a special cleaner before moving on.
Tip: A level helps you spot trouble spots and keeps your panels straight. This step saves you headaches later!
Now, it’s time to measure and mark where your panels will go. Start with the longest wall in your room. Use a tape measure to plot out the largest rectangle you can, checking diagonals to make sure everything is square. Mark ceiling corners at different depths and use these points to measure across the ceiling. Repeat this for the side wall heights. These marks guide you and help you keep everything lined up. If you’re working with multiple panels, lay out rectangles for each section so you know exactly where to place them.
Measure the longest wall first.
Mark key points at the ceiling and sides.
Use a level to draw straight lines for panel placement.
A clean wall makes all the difference. Dust and grime can stop panels from sticking well. Start by dusting with a microfiber cloth. Protect nearby surfaces with painter’s tape. Mix warm water with a mild detergent and gently wash the wall in circles. Rinse with clean water and blot dry. Make sure the wall is completely dry before you begin. Fill in any bumps or holes and sand them smooth. If your wall has heavy texture, consider sanding or skim coating for a flat finish. Apply a primer for a uniform surface and let it dry fully.
Note: Taking time to prep your wall means your panels will last longer and look better.
Ready to move on? With your walls assessed, measured, and cleaned, you’re set for a successful installation. If you need help, Unipower’s support team is always here for you.

Are you ready to change your room? Let’s go through each step for installing wall panels. With some planning and patience, you can make your room look great. You do not need to be an expert to get a nice result.
First, decide how you want your paneling to look. Do you want it to go up and down, side to side, or in a special pattern? Think about the shape of your room and where you want people to look. Good planning helps you waste less and makes things easier.
Use a level to draw lines on your wall. These lines help you keep your wall paneling straight.
Mark where each panel will go. This is important if you have windows, doors, or outlets.
Place your panels on the floor first. This lets you see how they will look and helps you plan the best fit.
Tip: Plan your layout before you start. This saves time and helps you avoid mistakes.
You want your wall panels to fit just right. Here’s how to cut them well:
Clean your workspace and remove anything in the way. Get your tools ready: a saw, pencil, and safety gear.
Measure your wall carefully. Double-check your numbers, especially if you have outlets or corners.
Draw your cut lines on the back of the paneling. Use a square to make straight lines.
Cut the panels with the right tool for your material. Use a fine-tooth saw for wood wall paneling. Use a circular saw or jigsaw for PVC or MDF.
Test each piece before you move on. This helps you avoid problems later.
Pro Tip: Put painter’s tape on your cut line. This stops wood wall paneling from splintering.
Now it’s time to put your panels on the wall. You can use nails or glue. Pick what works best for your wall and the look you want.
Method | Pros | Cons |
|---|---|---|
Nails | - Strong hold for busy areas. | - Can cause small cracks. |
Glue | - Smooth finish with no fasteners. | - Hard to remove. |
How to use adhesive:
Put construction adhesive on the back of the panel in a zigzag.
Press the panel onto the wall, starting at the bottom.
Hold it for a few minutes or use painter’s tape while it dries.
How to use finishing nails:
Put the panel on the wall and line it up with your marks.
Use a nail gun or hammer to put nails in the edges and into wall studs.
Push the nails in a little and fill the holes with wood filler.
Note: Unipower panels are easy to install. If you have questions, the support team can help with guides and answers.
Walls often have outlets, switches, or windows. Here’s how to work around them:
Measure and mark where each obstacle is on the back of your paneling.
Use a square to draw straight lines for the cutout.
Drill holes at the corners of your outline.
Cut out the opening with a jigsaw.
Test the panel before you attach it to the wall.
Use painter’s tape before cutting to stop splinters, especially with wood wall paneling.
Tip: Take your time with these cuts. Careful work gives you a neat look.
You want your panels to look straight and even. Here’s how to check:
Use your level to check each panel as you put it up. Adjust before the glue dries or before you nail.
Draw lines on the wall before you start. These lines help you keep things straight.
Plan your panel placement to waste less and avoid hard cuts.
Make sure your wall is flat, dry, and clean before you start. A good surface keeps your panels in place.
Note: Unipower’s panels are made for a good fit and easy alignment. The support team has instructions, guides, and answers to help you.
⭐ Customer Review:
“I put Unipower wall panels in my garage and living room. The instructions were easy to follow, and the panels fit well. The support team answered my questions fast. I am very happy with how it looks!” — Jamie L.
With these steps, you can put up paneling with confidence and enjoy a new, stylish room. If you need help, Unipower’s team is always ready to help you.
After you finish installing your wall panel, you want everything to look smooth and professional. This part is all about sealing gaps, adding your favorite finish, and cleaning up so your space shines.
Gaps between panels can happen, but you can fix them easily. You want your wall to look seamless. Here’s how you seal those spaces:
Choose a high-quality sealant like Blue Barrier Gap Filler. It keeps moisture out and gives a neat finish.
Clean the gap with a wire brush. Remove dust using compressed air or a vacuum.
If the gap is bigger than 1/4 inch, push a backer rod into the space. This helps the sealant stay in place.
Apply the sealant smoothly along the gap. Make sure you don’t leave air pockets.
Tip: Take your time with sealing. A careful job means your paneling will last longer and look better.
Now you get to pick the look you want. The right finish makes your wall stand out and protects it from wear. Check out these options:
Finish Type | Pros | Cons |
|---|---|---|
Satin Paint | Highly non-reflective, easy to clean | Less reflective than semi-gloss |
Semi-Gloss Finish | Increased protection, water-resistant | More reflective than satin |
Gloss Finish | Sleek, elegant, highly durable | Requires careful maintenance |
Polished Finish | High shine, enhances aesthetics | N/A |
Textured Plaster | Adds depth and dimension | Difficult to repair |
You might like satin paint for rooms that need frequent cleaning. Semi-gloss works well in kitchens and bathrooms. Gloss finish gives you extra durability in busy areas. If you want a shiny look, polish your panels by sanding or buffing.
Note: Always let the paint or finish dry completely before you touch or clean your wall.
A tidy workspace makes your new wall look even better. Here’s a simple cleanup routine:
Dust the panels with a soft microfiber cloth or a vacuum with a brush attachment.
Mix a few drops of mild detergent with warm water. Wipe down the panels gently.
Use a soft-bristled brush for grooves or textured spots.
Rinse with a clean damp cloth and dry to prevent water spots.
Blot stains right away with a diluted detergent solution.
Protect your finish by applying a coating or polish if needed.
You did it! Your wall panel project is complete. Enjoy your fresh, stylish space.
Even with careful planning, you might run into small problems during your wall panel installation. Don’t worry! You can fix most issues with a few simple steps. Let’s look at some common challenges and how you can solve them.
Sometimes, panels don’t line up perfectly. You might notice gaps or uneven edges, especially around outlets or switches. Here’s what you can do:
Use a level and measuring tape often. Check your progress as you go.
Keep spacers handy. They help you create even gaps between panels.
If you see misalignment after cutting holes for electrical boxes, try a panel mounting system like Fastmount. This helps you get a perfect fit.
For bigger alignment problems, use a laser or string line to measure and adjust the substructure.
Tip: Regular checks with your level make sure your wall looks straight and professional.
Not every wall is perfectly flat. Uneven walls can make paneling tricky, but you have solutions:
Gather your tools. You’ll need a level, saw, nail gun, hammer, tape measurer, nails, adhesive, trim, and a stud finder.
Find the studs in your wall. Mark them for secure panel attachment.
Measure the height and length of your wall. Pay attention to any uneven spots.
Apply adhesive to the back of each panel. Start attaching panels from the top and work down.
Add trim to cover gaps. Sand rough edges and paint for a smooth finish.
Note: Taking time to prep and measure helps you get a great result, even on tricky walls.
Small mistakes happen. Maybe you spot a scratch, dent, or tiny gap after installing your wall panels. You can fix these quickly:
Fill small gaps with caulk or sealant. Smooth it out with your finger or a tool.
Use wood filler for dents or nail holes. Let it dry, then sand it smooth.
Touch up scratches with matching paint or finish.
If a panel gets damaged, remove it carefully and replace it with a new one.
You’ve got this! Quick repairs keep your wall looking fresh and stylish.
You can install wall paneling with confidence by following these simple steps:
Plan your layout and mark your walls.
Prepare your space and gather tools.
Cut panels to fit and secure them.
Finish with caulk for a seamless wall.
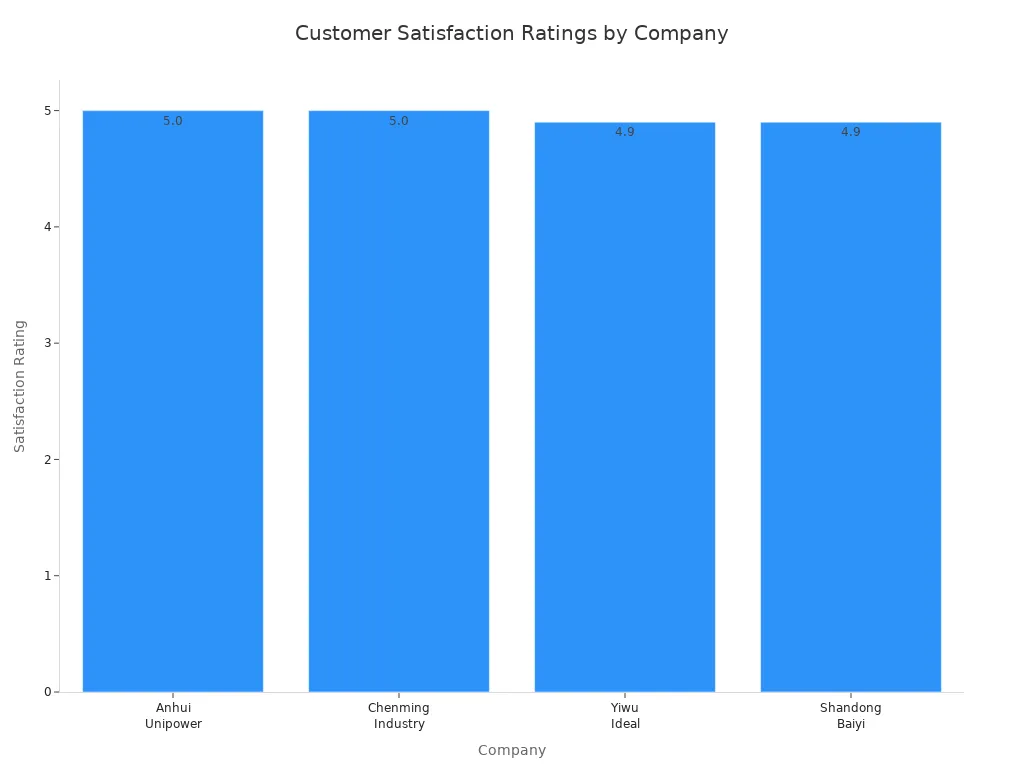
Unipower stands out with a 10-year warranty and top customer satisfaction ratings.
Provider | Warranty Length |
|---|---|
Unipower Pro | 10 years |
Industry Standard | 5 years |
Most beginners feel proud of their professional-looking results and enjoy the new look and durability. If you need help, Unipower’s guides and support team are ready for you. Share your finished wall or reach out with questions!
Think about where you want to install the panel. For wet areas, pick PVC. For living rooms, wood or MDF works well. Always check for moisture, style, and how easy it is to clean.
Yes, you can! Most panels come with simple instructions. If you use Unipower panels, you get clear guides and helpful support. Just follow each step and use the right tools.
You get the best results on smooth, dry, and even walls. Remove old wallpaper, nails, and dust before you start. If your wall is uneven, use furring strips or add a thin layer of plaster.
Use a soft cloth or vacuum with a brush. For stains, mix mild soap with water and wipe gently. Avoid harsh chemicals. Regular cleaning keeps your wall panel looking new.
Don’t worry! If a panel is crooked, remove it and try again. Fill small gaps with caulk. For bigger issues, contact Unipower’s support team. They can help you fix most problems quickly.